Guest Post…Paper Pin Wheel Tutorial by Jessica
In today’s post we learn how to craft our very own summer pin wheel, by Jessica of Living the Swell Life.
A bit about Jessica
![]()
Jessica is a crafty mama / budding photographer by day and an ICU nurse by night. She loves Jesus, lives to write her blog, Living the Swell Life and enjoys helping her husband with their family photography business. In her precious free time, she delights in baking brownies from scratch and eating them in their ooey-gooey, directly from the oven form. She considers transitioning her son to cloth diapers to be one of her life’s greatest accomplishments and dreams of growing a vegetable garden in her new backyard.
*******************************************************************************
Paper Pin Wheel How-to
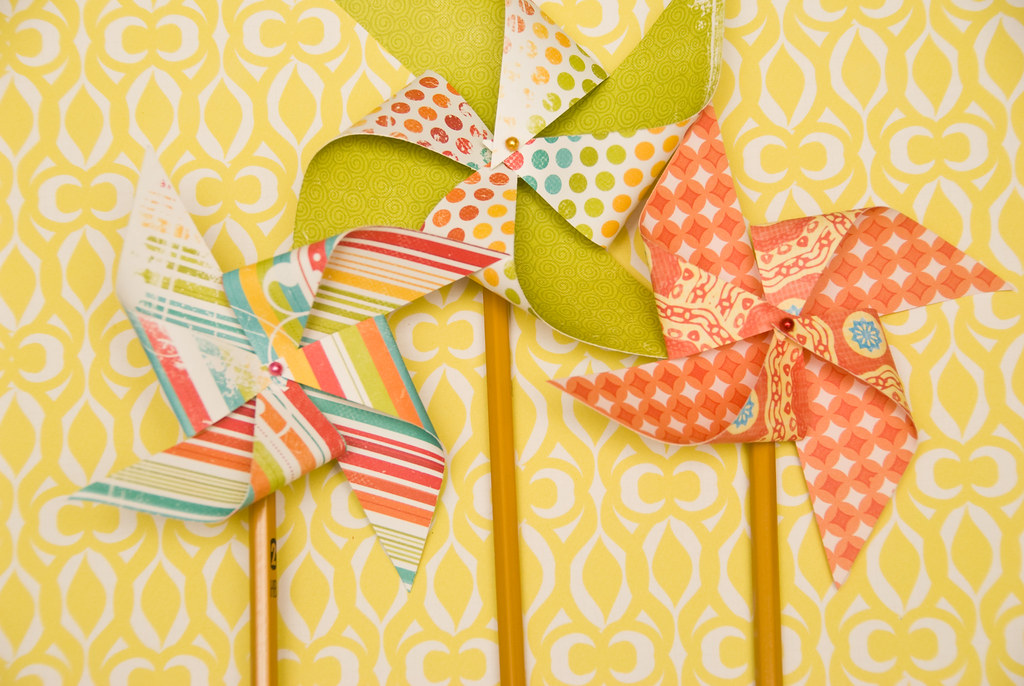
I thought I’d share this simple tutorial to kick off the season of sandals+ sunshine. They are quick to make and would make killer centerpieces and/or favors at that big summer bbq you’re planning. Or what an amazing send-off at your summer wedding…Imagine all your guests lined up with hundreds of bright paper pinwheels in hand. Yum. Or you could just make one for you. For your little flower bed. No fancy occasion necessary.

First things first, gather up:
a bunch of cheap yellow pencils (you can sharpen and reuse them in September!)
scissors
pretty sewing pins
double-sided paper (stock up at your local scrapbooking store)
1. Cut your paper into 4×4″ squares. (5×5″ makes a slightly larger, equally cute pinwheel. Go ahead, experiment with sizes.)
Next make 4 diagonal cuts toward the center. Stop about an inch shy. No mathematical equations here. Just eyeball it.
2. Gently fold pieces to the left of each cut toward the center. Hold firm with your thumb.
3. Press pin through center, being careful to catch all 4 corners.
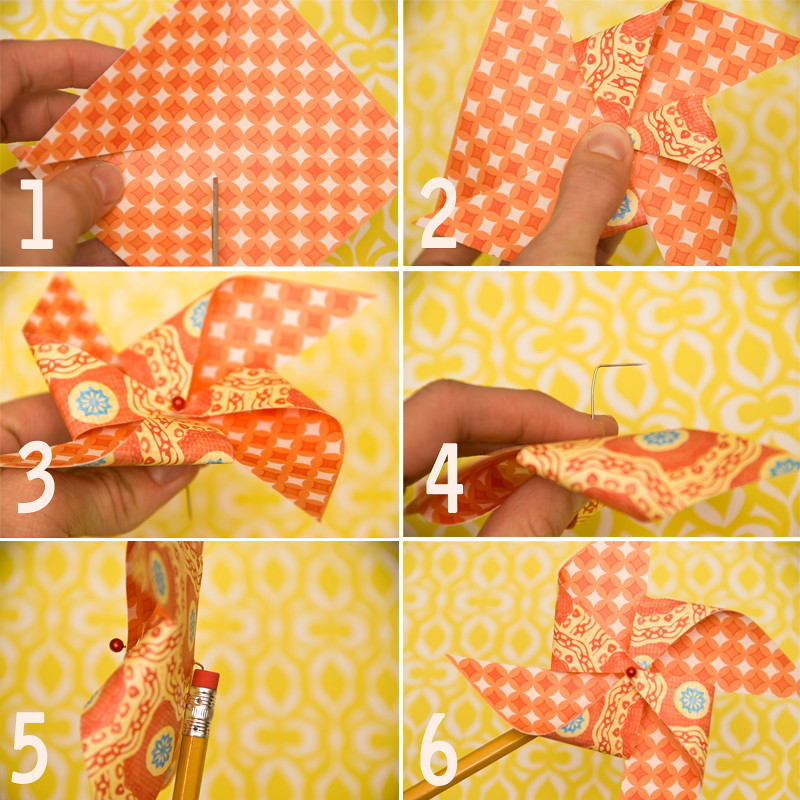
4. When the pin reaches the other side, bend it into a 90 degree angle. (Hint: I actually poked mine straight through the pencil eraser first, then bent down. It doesn’t matter how you bend it…As long as you get the job done.)
5. Press pin firmly through top of pencil eraser.
6. Give it a whirl! Easy, peasy, right!?
********************************************************************
Thanks once a gain to Jessica for sharing her tutorial with our readers.
For more information on Jessica


What sweet little pinwheels! Thank you for sharing this tutorial. Now I am off to let my kids pick out some double sided paper, I am sure they’ll love making these to decorate for an upcoming birthday!
Birthday Pin Wheels are the best! Thanks for the comment~Laura
These are beautiful, great paper! I made some myself for my boy to play with back in April, see my post here:
http://mamaboricuaenbrooklyn.blogspot.com/2010/04/resolucion-numero-dos-reusar-materiales.html
I have yet to find double sided paper that I like enough on both sides. Need to make a trip to a scrapbooking store ASAP! Thanks for the comment Marixsa
I love these and just followed your tutorial to make some for my daughter’s first birthday. Will link to you on my chikaustin site next week. Thanks!